


WHITE DOT SCREEN
Complete guide of the causes, diagnosis, and solutions for white dots and spots
appearing on the screens of iPhones, iPads, laptops, tablets, and desktop monitors.
You sit back to relax by watching a movie, finish working on a presentation, or simply browse through your smartphone, only to find yourself staring right back at a small white dot on lcd screen of your device. It does not disappear even when you clean it. You turn off and start it again, yet it continues to remain there, defying all your attempts to ignore it and pay attention to other things.
If this sounds like a scene that you have already experienced before, don’t worry; you definitely aren’t alone. White dots and bright areas are some of the most frequent screen problems reported for all devices ranging from iPhones, Androids, iPads, laptops, desktop computers, and large LCD television screens. While a small dot may not seem significant in itself, it tends to become more annoying over time and in some cases, is indicative of deeper hardware damage.
The purpose of this guide is to address all possible questions that you may have regarding white dots on display screens: Why do they occur? Are they repairable? What can you do yourself? When should you get your device professionally checked? We will discuss all aspects starting from the actual manufacturing of LCD screens to the software configuration of your iPhone, which causes what seems to be a technical malfunction. At the end of this guide, you will be well-informed of all possible causes and solutions.
How LCD Screens Actually Work: Understanding What You’re Looking At
It’s always important to first consider what is going on before analyzing what happens when things go awry. In this case, it is important to understand what an LCD display really is before moving onto the issues. Everyone knows the term “LCD” but few really know how it works.

LCD screen is not a single glass; it is a well-designed layer cake made up of different types of components for certain functions. First, there is the backlight, which is made of rows of LEDs either mounted on the periphery or inside of the LCD display. It generates high-quality light rays that travel in the forward direction to illuminate the screen.
The light guide plate immediately precedes the backlight, spreading its light evenly throughout the screen surface. Following these are a number of optical films including the reflector, diffusers, and brightness enhancement films. Here again, the function of the diffuser film is critical because it disperses light to ensure a uniform illumination across the screen rather than localized areas of high brightness where each LED lies.
As these layers of optics are crossed, the rays then move on to the liquid crystals themselves, the essential components of a display device. Liquid crystals are organic compounds, capable of rotation through an electric pulse; they determine the amount of light passing through. The transistor located behind each pixel supplies the necessary pulses, twisting the liquid crystals to an optimal position. In front of the liquid crystals there are polarizers – two sheets at a 90-degree angle from each other – and a color filter array which colors each subpixel with either red, green, or blue.
In most new devices utilizing touch screens, another important part of the stack of displays is a digitizer, used to perceive touches, and then a protective glass such as Gorilla or Sapphire. Under normal circumstances, none of this technology is ever in the spotlight. It’s only when something gets out of place or deteriorates that problems arise.

Why White Dots and Spots Appear on Screens
A white spot does not just pop up from nowhere. There is always a reason behind it, and getting to know that reason is the very first step before you try anything else. If the screen is white because of some sort of pressure damage, then the solution to that problem will be entirely different from the solution to the other reasons.
1. Backlight Diffuser Sheet Displacement
This is probably one of the most common problems with hardware that causes white spots to occur on laptops, computer screens, or LCD television sets. Do you remember the diffuser sheets we mentioned inside the screen? These are optical film sheets that are not glued to the glass panels but are just loosely inserted into the housing of the screen. It means that they can move out of position easily.
The problem appears because when the screen gets any type of shock, either physical or mechanical, diffuser sheets may move out of their usual position. This way, they create a small area where backlighting isn’t scattered correctly, and a white or yellow light appears. In this case, there is a small area between the glass panels where raw light comes in contact with your eyes without proper dispersion.
Sometimes, if the shift of diffusers is minimal, pressing the edges of the screen can help correct it.
2. Pressure Damage to the LCD Panel
The liquid crystal layer used in modern LCD displays turns out to be quite fragile. It is placed between two thin substrates of glass, and an excessive pressure on the screen or even the accidental impact from dropping the gadget onto a hard surface leads to the destruction of its layers.
In this case, the liquid crystals in the damaged region get misaligned and remain open to the backlight all the time; therefore, the affected display area starts looking bright white. Unlike a displaced diffuser, the pressure damage does not go away, the white spot will not change its position depending on the applied force or the pressure location, and cleaning will not help.
The hardest thing about the pressure damage is that the affected areas may get detected after several days or even weeks. The impact from the applied pressure gradually leads to failure of the inner layers.
3. Dead or Stuck Pixels
Pixel represents the smallest unit of display made up of red, green, and blue subpixels. The failure of the transistor responsible for turning a particular pixel causes the pixel to stay switched on and remain a bright spot (white in most cases, although there have been instances of red, green, or blue spots as well).
It is critical to differentiate between a stuck and a dead pixel since a stuck pixel still receives a continuous supply of power whereas a dead pixel does not receive any energy. As a result, while dead pixels manifest themselves as black spots, stuck pixels remain bright irrespective of the image displayed on the screen.
It should be noted that stuck pixels are more apparent when observed against dark backgrounds, which explains the usefulness of test pages such as the ones available on your display testing website. It is almost impossible to overlook stuck pixels if you look at a page with solid black or red background.
4. Damaged or Failing LED Backlight
The backlighting in larger displays like televisions, computer monitors, and larger laptops, is somewhat different. While edge lighting remains prevalent in smaller devices, most panels above a certain size use a full-array or direct lit backlight setup. In such cases, if one or several LEDs of an array become faulty, or simply begin glowing brighter compared to the rest, they will generate a white hotspot that becomes visible on the display.
Such spots are generally larger than the usual stuck pixels and tend to cover several centimeters rather than being a pinpoint. Additionally, a backlight problem may manifest as a bright area that pulsates or changes its intensity based on the brightness setting. Reducing the screen brightness usually helps to alleviate or minimize such a problem.
5. Dust, Debris, and Contamination
The smaller the equipment, and especially the laptop, the more susceptible it is to small particles entering the system through the ventilation holes and accumulating on the internal optical layers. Even a small particle that happens to fall on the diffusing layer or directly onto the rear surface of the LCD can cause a white hot-spot due to the unusual reflection or concentration of light.
Such spots tend to have unique properties compared to mechanical damage; they are not as hard-edged and will change position if tilted at a certain angle. If you suspect having been somewhere dusty lately or the appearance of spots took place slowly over time without an accident, then contamination must be considered one of the main suspects.
6. Manufacturing Defects
In rare circumstances, white spots are present upon purchase. The process of manufacturing LCD panels allows for some panels to be released with slightly offset layers, improper bonds, or faulty adhesive points, which may wear off within just a short while. This can happen in low-end products, although high-end devices do suffer this problem sometimes as well.
If you see white spots on your new unit within just a couple of months, especially when the device was not involved in any impact, then it is highly probable that the product suffers from a manufacturing defect. Make sure to document it with pictures, as most devices usually have a minimum one-year warranty period.
7. Component Aging and Heat Damage
However, similar to all electronic devices, the components of a display will deteriorate with the passing of time. Adhesive used to bond various components inside might dry up and contract, resulting in delamination. Moreover, LED lights that form the backlight system will become dimmer and less uniform in light output over time.
Display screens that have been stored in a hot car or used for a prolonged period close to a heat source are especially susceptible to the formation of white spots. Such spots will tend to increase both in number and size, contrary to what one might expect if caused by an impact.
White dot on ipad screen, white dot on phone screen, white dot on iphone screen:
When It’s Not a Hardware Problem at All
This is one of those things that many people find hard to believe: On an iPhone and an iPad, white spots are not hardware-related. They are actually software-related, and the most popular one among these spots is AssistiveTouch. It would help if you learned this lesson before you tried pressing anything into your device.
AssistiveTouch: The Most Common “Fake” White Dot
AssistiveTouch is an accessibility option offered by iOS that creates a virtual interface on your phone which floats above all other elements and acts as an alternative control for users who have trouble pressing physical buttons. The AssistiveTouch icon looks like a transparent white circle which can be dragged anywhere and left floating on the screen, even in one of the top corners.
For people who do not remember enabling this option, its presence might come as a total surprise, particularly if it had been turned on by accident when another person used their device or made a certain gesture with their finger. Fortunately, disabling this option does not take more than fifteen seconds.
How to Turn Off AssistiveTouch on iPhone or iPad
See AssistiveTouch on the screen circled in RED

1. Open the Settings app on your iPhone or iPad.

2. Scroll down and tap Accessibility.

3. Tap Touch on the bottom of the screen

4. Tap AssistiveTouch at the top of the Touch settings

5. Toggle the switch to the OFF position (it will turn grey).

6. The white dot will disappear immediately from the screen.

iOS Glitches and Software Bugs
Following a new iOS release, many people may experience graphic distortions like a white dot that pops up briefly or even remains permanently on the screen. However, these issues are not actual physical defects; instead, they stem from bugs in the graphics rendering process at the software layer, which can be fixed in future iOS updates.
In case you have just upgraded your device’s iOS version and spotted a white dot that was previously absent, a software problem could be the reason. In addition, if the white dot seems to be somewhat transparent or flickering at times, you should consider software-related causes.
How to Rule Out iOS Software Issues
- Force-restart your iPhone: Press and quickly release Volume Up, then Volume Down, then hold the Side Button until you see the Apple logo.
- Check if the spot persists on the lock screen and during the startup logo — if it doesn’t appear during startup, it’s software-related.
- Go to Settings > General > Software Update and install the latest iOS version.
- If the problem persists, go to Settings > General > Transfer or Reset iPhone > Reset > Reset All Settings (this won’t delete your data, but resets system preferences).
- As a last resort, perform a full factory reset through Settings > General > Transfer or Reset iPhone > Erase All Content and Settings (back up first).
The Green or White Dot in the Top-Right Corner — System Notifications and Recording Indicators

This one trips up a lot of people. Since iOS 14, iPhones display small colored dots in the top-right area of the screen when certain hardware is being accessed. An orange dot means the microphone is being used. A green dot means the camera is active. In some situations, system recording or screen activity indicators can appear as small white markers in similar positions.
If your white dot appears specifically in the top-right corner, shows up only during certain activities, and disappears when you close certain apps, it is almost certainly a system notification indicator — not a hardware problem.
Additionally, the AssistiveTouch button can be dragged to any edge of the screen, including the top-right corner. If someone moved it there, it would look remarkably like a permanent hardware spot until you try to tap it and discover it responds to touch.
External Damage and Dust on Mobile Screens
iPhones and iPads are carried around everywhere, inside pockets, bags, and sometimes drop them on various kinds of surfaces. Although the glass protecting their screens is durable enough, it certainly is not invincible. A collision with a corner of a hard surface, a key or a coin kept in the same pocket, or even a tiny bit of dirt caught underneath a screen protector can cause areas on the screen to appear bright in color as if it was caused by stuck pixels, while in reality, it may be caused by surface- or subsurface-contamination.
One method for differentiating between these problems is analyzing the affected area with the aid of a magnifier or through macro photography using another device’s camera. Contamination on the surface of the glass should have a barely noticeable texture or a ring around it, while a stuck pixel would be a perfectly bright spot with no deformation of other pixels nearby.
White Dot on Screen Laptop and on Desktop Monitor Screens
Though smartphones have their own specific reasons for generating a white dot, which include factors like Assistive Touch, laptops and computer screens are plagued by hardware problems when they encounter white dots. Luckily, not all of them need professional help to diagnose or repair; unfortunately, others do.
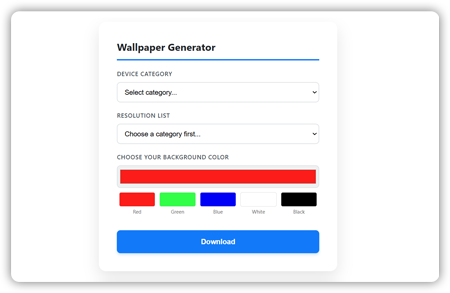
Diagnosing the Problem: Using Full-Screen Color Tests
As always, the first and the key step in dealing with such a problem is to run an adequate diagnostic test. Here, a color checker for the entire screen surface, such as the one provided by this website, proves to be particularly useful. You can run the color checker test you can find on top of this screen. The reason is simple: the nature of the underlying issue varies according to the color of the background used during the test. The cause of appearance of white dot on screen laptop, mobile phones and tablets, can differ from some monitors, but all can be checked in the same way.
- Background color black: Ideal for finding stuck pixels that appear as small, bright spots, as well as backlight bleeding (light leakage along the edge of the screen);
- Background color white: Ideal for finding dead pixels, that appear as dark spots;
- Background colors red, green, and blue: Used to find out which particular sub-pixel (red, green, or blue) got stuck, and disappears once the background color matches that of the pixel;
- Background colors orange, yellow, pink, burgundy: Mid-tone colors, which help differentiate between a pressure mark (which is usually visible regardless of the background color) and a stuck pixel (that disappears when the screen color matches that of the pixel).
WHY DIVERSE COLOR BACKGROUND MATTERS: A stuck blue sub-pixel, for example, remains virtually invisible against a blue background yet is clearly noticeable against a white or yellow background.
Step-by-Step: How to Fix White Spots on Laptop and Monitor Screens
Step 1 — Identify the Spot Type
Study the white dot during your full-screen color checkup. Do you have a pinpoint, sharp-looking dot? Then it could be a stuck pixel. Do you have an oval-shaped area several centimeters wide? It is most probably diffuser or backlight-related problem. Does its shape change if you bend the display bezel slightly? This indicates diffuser displacement. Take a photo to remember its shape.
Step 2 — Clean the Screen Surface
The first thing to do is to make sure that the problem cannot be solved by cleaning the screen from the dirt. First of all, switch off the monitor. It is easier to find any contamination on a dark screen. Use a lint-free microfiber cloth exclusively to wipe the display surface. Absolutely avoid using paper towels and other materials. In case some areas are particularly dirty, lightly moisten a small portion of the cloth with distilled water or use special monitor cleaning liquid. Alcohol-based products are strictly prohibited.
Step 3 — Try the Gentle Pressure Technique (Diffuser Displacement Only)
The method is suitable to use only if there is a high probability of diffuser displacement – the one that occurred following a hit to the screen, which is accompanied by blurry or indistinct edges of the white spot.
- Turn off the screen completely.
- Wrap your thumb in a microfiber cloth to avoid direct skin contact with the panel.
- Apply very gentle, circular pressure around — not directly on — the white spot.
- Move to the edges of the spot and try to gently work the pressure inward.
- Turn the screen back on and check the result.
- If no improvement, stop — additional pressure risks making things worse.
IMPORTANT WARNING:Always avoid applying direct pressure to the LCD display screen using your fingers or any object. Pressure can cause damage to the liquid crystals, resulting in a much bigger dot.
Step 4 — Use our Pixel Repair Tool
However, for stuck pixels in particular, there actually exists a method called “color cycling” that has been known to work. The theory behind this technique is that a stuck pixel might be “locked” as a result of a constant stream of electrical impulses, and quickly switching between various voltages (by cycling colors) can “unlock” it.
Our pixel repair tool works by cycling through colors, typically red, green, blue, white, and black — at a high frame rate, ideally 60 frames per second. The high frequency of switching is what makes this approach effective. Running this tool for 20 to 60 minutes gives the transistor sustained exposure to the cycling signal.
Our website’s pixel repair tool does exactly this — running the color cycle at 60 fps in full-screen mode. Here’s how to get the best results:
- Identify the stuck pixel location precisely during your color test.
- Launch the pixel repair tool and enter full-screen mode.
- Let it run for at least 20 minutes without interruption. For persistent pixels, run for up to 2 hours.
- Check the screen every 20 minutes — sometimes the pixel fixes itself midway through.
- If successful, avoid the conditions that caused the pixel to stick (often sustained pressure or heat).
- If unsuccessful after multiple sessions over several days, the pixel is likely permanently dead.
The effectiveness of pixel fix software increases when used on pixels that have stuck recently. The likelihood of repairing stuck pixels decreases with their duration of being stuck. Several individuals have reported success in fixing pixels by repeating the process for several days.
Step 5 — Update Display Drivers (Windows and macOS)
Before assuming the problem is purely physical, update your graphics driver. A driver bug can occasionally cause a persistent graphical artifact that looks exactly like a stuck pixel but responds to software intervention.
On Windows, go to Device Manager, expand Display Adapters, right-click your GPU, and select Update Driver. On macOS, graphics drivers are bundled with system updates, so going to System Settings > General > Software Update is the equivalent step. After updating, restart the machine and check whether the spot remains.
Step 6 — Adjust Display Settings
In some cases, reducing the backlight’s strength can result in the hotspot becoming much less noticeable when related to the diffuser. This can be done by clicking on the desktop in Windows and selecting Display settings, after which you should change the brightness. Alternatively, on a Mac, click on System Settings > Displays and reduce the brightness. For external displays, this is achieved by pressing the menu buttons and changing the brightness on the OSD.
Step 7 — Seek Professional Repair
In the case that none of the above-mentioned steps have helped solve the problem, it would be advisable to consult a specialist. The task of the repair specialist is to access the device and see whether the diffuser is able to be moved or whether it should be replaced altogether. It is also important to make sure whether the device comes with a warranty; manufacturing flaws are usually covered by a warranty, while damages are not.
While looking for a repair company, one must pay attention to shops providing free diagnostics and offering warranties on their services. It is also vital to clarify whether the specialist intends to try to move the diffuser before resorting to replacing the entire panel.
Do White Spots Get Bigger Over Time?
This is among the most frequently raised issues, and the true answer is – yes and no. It depends on what causes the defect in question. To put it simply, backlight diffuser spots and pressure-related damages tend to increase in size over time, while stuck pixels will not change their dimensionality.
Diffuser displacement spots will continue expanding as long as the displacing process persists. This means that spots formed due to backlight diffuser displacement may grow in size depending on usage intensity, temperature variations (due to the expanding effect in hot conditions), and further impact on the display.
In addition, pressure-caused damages to the glass substrate will continue developing over time depending on the usage intensity. Glass fractures will spread and involve neighboring pixels one after another.
PRACTICAL ADVICE: If your screen develops a visible spot in white color that appears to be expanding – you should consider taking action fast. The longer you delay repairing of diffuser displacement issue – the more displace it will become. In many instances, timely help could have saved you a lot of money by fixing just a diffuser problem instead of replacing the entire panel.
How to Prevent White Spots From Appearing
An ounce of prevention is worth a pound of cure — particularly when “the cure” might be a several-hundred-dollar screen replacement. Most white spots are avoidable with some simple habits.
For Mobile Devices (iPhones, iPads, Android Phones)
- Always use a case. A good quality case with raised edges around the screen provides vital protection against screen-down drops.
- Use a tempered glass screen protector. It won’t prevent diffuser displacement, but it will absorb some shock from impacts and prevent direct surface damage.
- Never put your phone in the same pocket as keys, coins, or other hard objects. These can press against the screen and cause stuck pixels or surface scratches.
- Avoid extreme temperatures. Don’t leave your phone in a hot car — heat accelerates adhesive degradation inside the screen layers.
- Clean the screen gently. Use only microfiber cloths. Never press hard while cleaning.
For Laptops
- Close the lid before picking up the laptop. Carrying it by the screen — even briefly — applies stress to the panel.
- Never place anything on top of a closed laptop. Even a charger cable can create enough pressure over hours to cause diffuser displacement.
- Use a padded laptop bag with a dedicated sleeve. Bag-within-bag protection is especially important if you carry books, water bottles, or other objects alongside your laptop.
- Keep the ventilation clear. A laptop that runs hot is a laptop whose screen layers are aging faster. Don’t use it on soft surfaces like beds or sofas that block the vents.
- If you transport a laptop frequently, consider a hard-shell case. The rigid shell distributes any impact forces around the device rather than through it.
For Desktop Monitors
- Never touch the screen surface with bare fingers. Skin oils accelerate surface degradation and can leave permanent marks if rubbed repeatedly.
- Clean monthly with a dry microfiber cloth. Never use window cleaner, paper towels, or household cleaning sprays.
- Position the monitor away from direct sunlight. UV exposure and heat cause adhesive and optical film degradation over time.
- Use a monitor with appropriate brightness for your environment. Running a monitor at maximum brightness for years shortens backlight life significantly.

Quick Reference: White Spots by Device Type
| Device | Most Common Causes | First Response |
|---|---|---|
| iPhone / iPad | AssistiveTouch icon, iOS recording indicator, stuck pixel, screen damage | Check AssistiveTouch in Settings > Accessibility > Touch first. Detect stuck or dead pixels with our tool on top of the screen. Use our pixel cycling tool to fix it. |
| Android Phone | Stuck pixel, screen pressure damage, notification LED artifact | Run a full-screen color test; try pixel cycling tool. |
| Laptop | Diffuser displacement (impact), stuck pixel, backlight failure | Color test, gentle cleaning, pixel repair tool, or technician. |
| Desktop Monitor | Stuck pixel, backlight hotspot, dust on panel, pressure damage | Color test, cleaning, driver update, pixel repair tool. |
| LCD Television | Backlight LED failure, diffuser displacement, aging | Reduce brightness; contact manufacturer if under warranty. |
When to Seek Professional Help
At some stage during troubleshooting a display, there comes a time when trying out further DIY repairs will only do more damage. It is essential not only to know what should be done but also when to know when to stop trying and take it to a professional.
If any of the below occurs, you should refer to a professional repair technician:
- The white spot appeared after a fall or impact and has soft, fuzzy edges covering more than a centimeter — this strongly suggests diffuser displacement, which requires opening the panel.
- The spot has been growing steadily over days or weeks, suggesting ongoing internal damage propagation.
- You’ve run the pixel repair tool for several sessions across multiple days with no improvement.
- Multiple white spots are appearing simultaneously, suggesting a systemic backlight or panel failure.
- The device is still under warranty — in this case, let the manufacturer’s service center handle it to preserve your coverage.
- You feel uncertain about any of the DIY steps above. Screen panels are delicate, and a mistake during a DIY repair can turn a fixable problem into an expensive total replacement.
In terms of repairing an Apple device, you can go for an Apple authorized service provider as they will be able to repair it by providing authentic Apple spare parts. In the case of a Windows laptop, the first thing to do is to get in touch with the authorized service center of the company making your laptop.
Start with the Simple, Then Go Deeper
White spots and dots on screens really are one of the more irritating display problems – not necessarily because they tend to be critical, but because there are so many potential causes for them, including such varied factors as a quick adjustment of settings to a complete hardware malfunction that requires professional service. The solution, however, relies on systematic troubleshooting techniques.
First off, begin with the most straightforward possibilities. With a smartphone or a tablet computer, verify your Assistive Touch settings and other indications of hardware malfunction. Next, identify the moment at which the spot appears – does it emerge while your device boots up, or does it appear when the operating system is fully loaded? Try to conduct a full screen test in multiple colors to accurately assess the situation. Finally, rule out all possible software problems and contamination of the surface.
In case of stuck pixels, you should turn to the pixel repair color-cycling utility, provided here at no cost, but offering reliable scientific solutions to the problem. This free tool will not work in all cases, especially concerning persistent spots, but its effectiveness is still high enough to make it worth trying.
If the issue is related to the inner workings of the panel, such as the movement of the diffuser or the malfunction of the backlight, or if there is extensive damage, then the best course of action would be to contact a repair shop for professional help, preferably one that offers diagnostic services. A display screen is an intricately designed device, and therefore its repair requires special knowledge and equipment.
Regardless of the underlying reason behind the white dot on your monitor, the contents of this article contain all the relevant information you will require to analyze it, detect the problem, and proceed further accordingly. Taking care of your screen is important, and in some instances, you may even be able to restore it to its pristine state.
Frequently Asked Questions
Can pressing on the white spot fix it?
Occasionally, very gentle pressure applied around (not on) the spot can reposition a displaced diffuser sheet — but this only works for a specific type of hardware issue and requires extreme caution. Pressing directly on the spot risks causing additional damage to the liquid crystal layer, potentially making the spot larger and permanent. This technique should only be tried as a deliberate, careful approach, not as an aggressive attempt to “push the spot away.”
Will the pixel repair tool on this website damage my screen?
No. The pixel repair tool works by rapidly cycling display colors at 60 fps — these are normal display operations within the screen’s designed parameters. There is no electrical overload or physical stress involved. The tool mimics what professional pixel-repair software has done for years, and it is completely safe for both LCD and AMOLED displays.
How do I know if my white dot is AssistiveTouch or a real hardware problem?
Try to touch the white dot. AssistiveTouch is interactive — tapping it opens a menu of virtual button shortcuts. If the dot is responsive to touch and opens a circular menu, it’s AssistiveTouch. If it doesn’t respond to touch at all, is visible even when the screen is off (look at the screen from an angle with ambient light), or appears during startup before any software loads, it’s a hardware issue.
My white spot is only visible on dark backgrounds — is that normal?
Yes, this is very typical behavior. Stuck pixels and diffuser hotspots are illumination-based — they produce more light than the surrounding area. Against a white or bright background, this excess light is masked by the equally bright surroundings. Against dark backgrounds, the contrast makes the extra brightness immediately obvious. This is why the black and dark-color test screens are so important for diagnosis.
Will the white spot spread?
It depends on the cause. Stuck pixels very rarely spread — they typically stay as a single fixed point for the life of the device. Diffuser displacement spots and pressure-damage areas, however, can and often do expand over time, particularly if the device experiences additional heat cycles or impacts. If the spot is growing, prioritize getting it looked at sooner rather than later.
Is it safe to keep using my device with a white spot?
For a small, stable stuck pixel, continued use is generally safe — it won’t damage other parts of the device and won’t typically worsen. For a spot caused by physical damage or diffuser displacement, continued use may allow the issue to gradually worsen. Monitor the spot weekly and seek repair if it changes in size or if additional spots appear.
My iPhone has a green or white dot specifically at the top right. Why?
There are three likely explanations. First, check Settings > Accessibility > Touch > AssistiveTouch — if it’s enabled, the floating button has been moved to the top-right corner. Second, the iOS privacy indicators for camera and microphone use appear in the top-right area — if you see a green or orange dot, that’s a system feature, not a hardware problem. Third, if neither of these applies and the dot is persistent, invisible to touch, and visible at startup, it may be a stuck pixel or pressure damage near the screen corner.
Does a screen protector prevent white spots?
Screen protectors protect against surface scratches and reduce direct shock to the outer glass, which can help prevent stuck pixels from direct impact. However, they cannot prevent internal issues like diffuser displacement, which is caused by forces transmitted through the device body during drops. They are a valuable protective measure but not a complete guarantee against white spots.
White dot on mobile screen
On the Pixel 7 Pro as well as on the other Pixel phone models, a small white dot occasionally appears in the status bar (to the left or right of the camera cutout). While the user identified that the left-side dot indicates more notifications to swipe through, the dot on the right side appears without any obvious messages or alerts in the drop-down menu, leading to confusion about its purpose.
That dot isn’t an error; it’s actually an “ellipsis” (…) for your status bar.
The presence of a dot happens whenever you have more system icons or notification icons on your screen than there is space available around your camera notch.
Here’s how you can deal with the issue:
The “Overflow” Dot: The dot means that you have additional icons (for example, Bluetooth, Alarm clock, VPN icon, etc.) that aren’t currently visible due to the overcrowdedness of your status bar.
Display Adjustments: If you’ve recently adjusted your display and font sizes to be larger, you’ll run out of space on your status bar faster. You should adjust these sizes downward to make space for your icons.